
 I’m Doug Riseden, the technical support manager for Hymax USA. In every issue, I’ll provide installation tips and tricks to help use Hymax products to their maximum potential.
Here are my two tips for this issue
- HYMAX bolts – Leave ‘em alone!
- Inserting pipes in the HYMAX – Give space for pipes to meet
 HYMAX bolts – Leave ‘em alone!
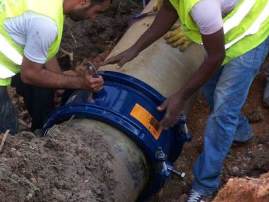
I often get calls about how difficult it is to remove bolts from a HYMAX and then to put them back on once the HYMAX is installed.
This is the case because the bolts aren’t meant to be removed in the first place. They are purposely knurled to prevent removal. You simply need to loosen the bolts, install the coupling and then tighten them again. This ensures the bolts stay in place and won’t be lost in your ditch when installing the coupling.
The next time you install a HYMAX, leave the nuts and bolts in place and you’ll be using it the way it’s designed to work.
 Inserting pipes in the HYMAX – Give space for pipes to meet
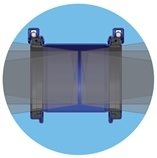
The HYMAX is designed for connecting pipes to flex four degrees within the coupling, allowing the pipes to move when the ground shifts.
For this feature to work, however, make sure that there is some space between the pipe endings. Don’t shove the pipes into the coupling until they touch. If they do, the connecting pipes will get in the way of each other, and will not allow for continuous dynamic deflection (CDD). Install the end of the pipe about three inches into the coupling. At that measurement, the pipes will be beyond the depth of the gaskets, and allow for a complete seal and CDD.
If you have any questions you’d like me to address in this column, just let me know! I can be reached at doug.riseden@HYMAXusa.com.